This assembly guide will walk you through the process of creating 12 double-sided layouts using assorted page protectors for the Everyday Life Album 6 x 8
This guide includes a Design Space file, photos, cutting diagrams, supply list, helpful tips plus an artwork review video.
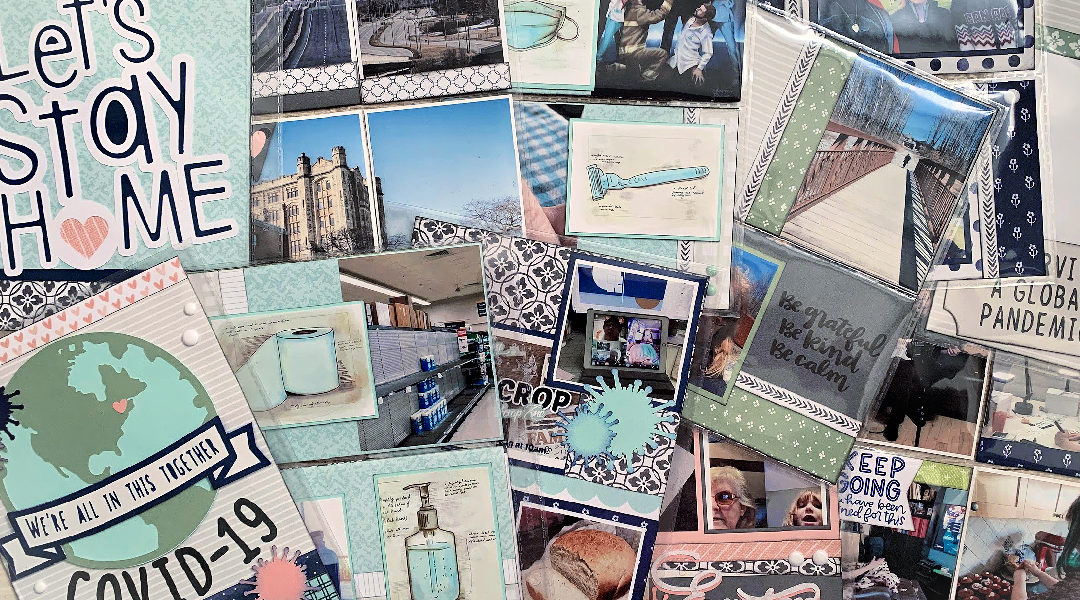
I wanted to share with you this pretty amazing project to help you document your COVID19 story. As a scrapbooker, this is a story that needs to be documented. I typically like to create 12×12 layouts but I knew this story needed many many pages. So this smaller format was ideal to help document my family’s experiences and the strange and unfamiliar world we are currently living in.
- Z3293 Clear Shimmer Brush
- Z4219 Everyday Life 6×8 Album
- Z3252 6×8 Page Protectors
- Z3192 4×6 Page Protectors
- Z3191 3×4 Page Protectors
- Mix-in Paper pack (May-June 2020)
- Z3314 White Dots
- CC3212 Let’s Stay Home stamp set
- Z2831 Charcoal
- Z8005 Sapphire
- Z2849 Peacock
To purchase the supplies to complete this project please visit my online store: JulieCarriere.closetomyheart.ca
To purchase the assembly instructions
What You Need to Know Before Purchasing this Guide
1. You will need a Cricut Design Space account to access the Design Space file to cut this project.
2. You will need all of the images used in this project. Some of the images have been sliced and welded to achieve the end result. Therefore images CANNOT simply be deleted. See the supply list for Cartridges used.
3. Once you receive the Design Space link, please save the project to your Design Space account. Cricut is constantly making up-dates that affects older links
4. When you place an order on my Online Store you’ll receive the assembly guide completely FREE.
5. The file will be sent via email to you shortly after you place your order. Please allow 12 hours, if this does not occur please email me.
6. The assembly guide includes: the cutting diagrams, helpful tips plus a complete process video, see link in the first photo.